Benjamin Tam
Independent Consultant
Mobile | .NET Core | Agile
By many accounts, Xamarin is a fantastic product that makes it easier for developers to build apps for a range of mobile devices. For me however, delivering that functionality well is only ‘par for the course’. That is, a seamless experience to develop an apk, ipk or appx is what I would simply expect for any offering that promises a common code base targeting multiple mobile platforms.
An approach that continues to strike me about Xamarin is their commitment to making the mobile software development life-cycle easy - the entire process of building, testing and monitoring to borrow from the company’s current mantra. The direction taken by Xamarin with the 4.0 release certainly builds upon the impressive suite of tools already available. One new feature of this release that I was particularly eager to get my hands on is the preview of the Xamarin Test Recorder. Whereas many other features available in the 4.0 release are evolutions of known tools, to my knowledge Test Recorder is a completely new offering. It is good to see the company not rest on their laurels!
To get the Test Recorder running, you first need to download and install the OSX package. However, there are several steps which are not explicit in the preview version of the documentation I was looking at. As such, I will outline them here should it help anybody.
You will need your Xamarin Test Cloud API key upon installation. This is available once you log in to your Test Cloud portal. In case you are wondering about hidden or unexpected costs, remember that all Xamarin subscribers have 60 free Test Cloud minutes each month!
If you wish to use the Test Recorder with an Android project, you will need to grant the ‘INTERNET’ permission in the Android Manifest.
Publish your apk or ipk locally. Then simply start Xamarin Test Recorder, select the apk/ipk you previously published and the magic begins!
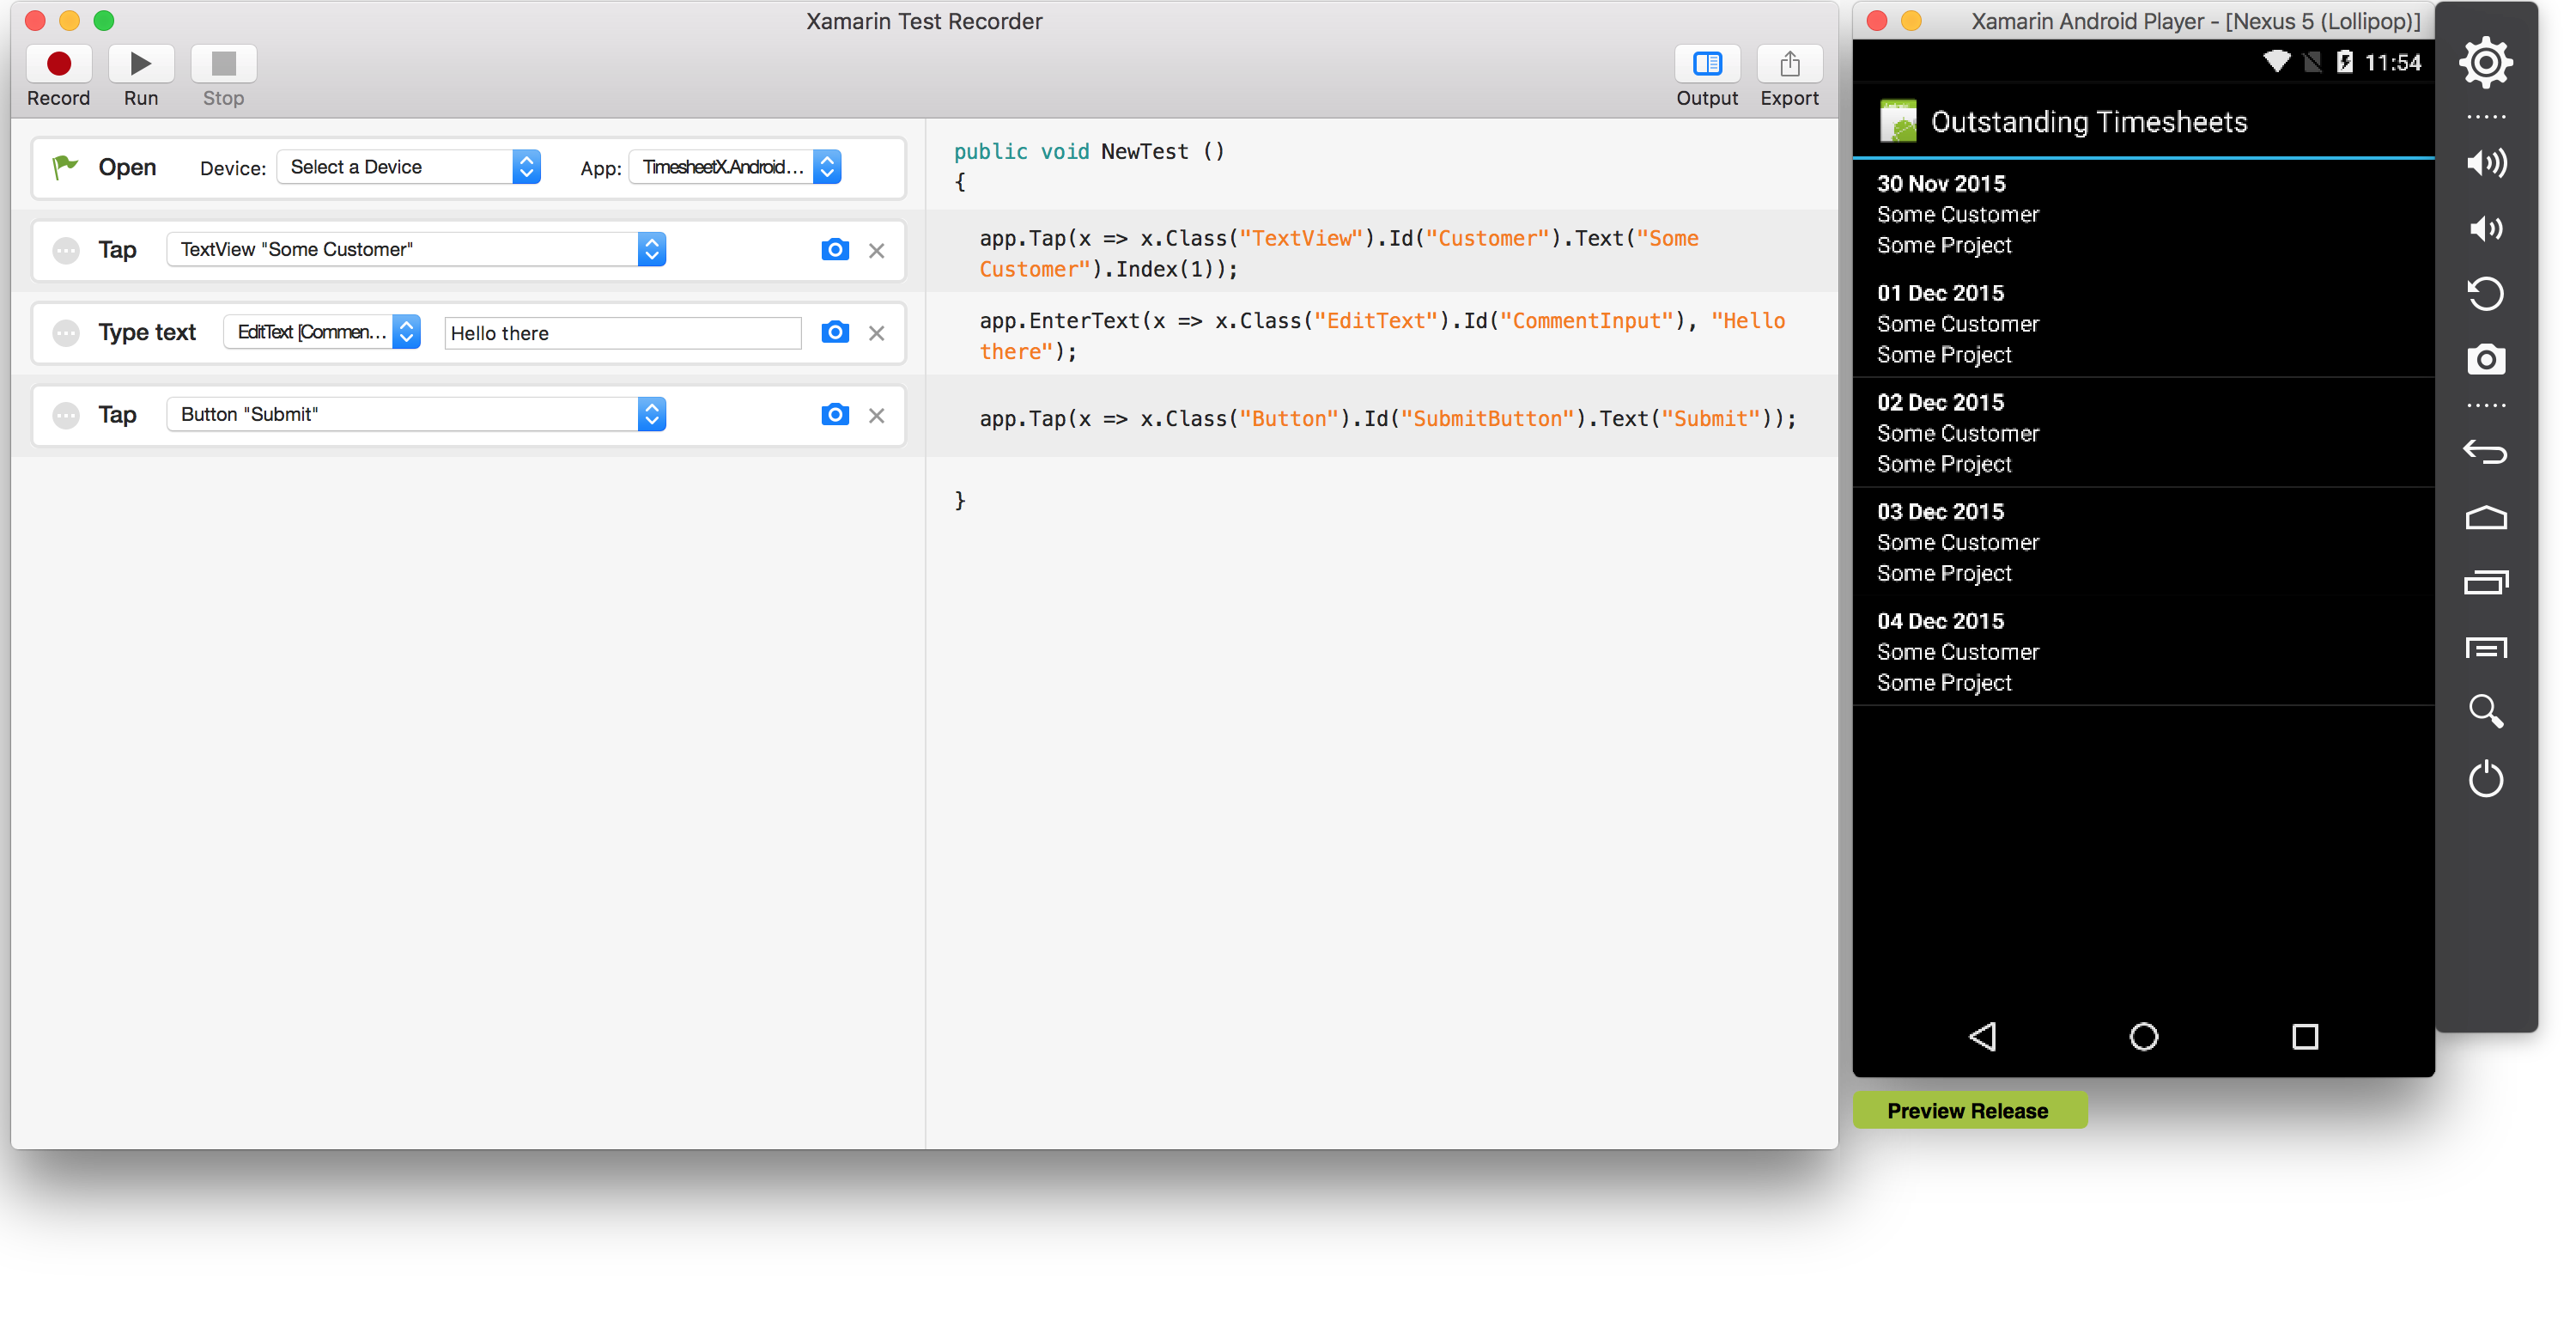
Now, all you need to do is hit ‘Record’ and starting using your app. When you finish the sequence you wish to test, click ‘Stop’. From there, you can either ‘Play’ the test sequence again, copy the generated Xamarin.UITest output to the clipboard, export to file to import into your test project, or send it straight to Xamarin Test Cloud. As you can see below, I have put the Test Recorder in action on the sample timesheet app I recently made available.

Manual testing is of course time-consuming and somewhat error prone, but absolutely necessary in software development. This is perhaps even more true in the world of mobile apps where there is much competition. But Xamarin.UITest and Xamarin Test cloud already solves the problem, so why do we need the Test Recorder? The answer is of course, the significantly reduced time for developers to write tests! Furthermore, there is even potential for non-developers to generate tests! Imagine empowering your BA or QA team who are not well-versed with Xamarin to develop tests … or even watching and replicating how your non-technical grandmother breaks your app!
I do wish it was more complicated to get the Test Recorder running, as it would make this blog post look more insightful and myself more intelligent! :) However, there really isn’t any significant barrier to entry if you are already an existing Xamarin developer. I can’t wait to use the Test Recorder on my next live project.
Xamarin, thank you for exceeding my expectations once again!